
Retro & Antique Rotary Phone Sale:
We have a range of telephones for sale, including bakelite telephones from the 40s to the 50s working or display pieces. We have retro dial telephones from the 1970s and push-button phones from the 1980s
Don't miss out on our pulse tone converter adaptor, now available at an affordable price of $129.00. This innovative device breathes new life into older dial phones, allowing them to dial out.
Old rotary phones from a bygone era can be brought back to life. Please email me with your inquiry to antiquephonesnz@gmail.com

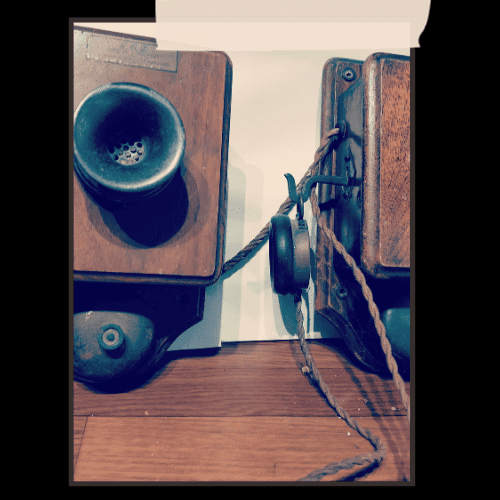
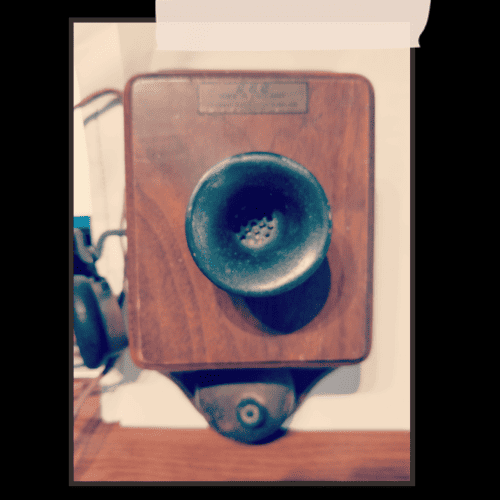
Pair of 1930s GEC interphone:
DISPLAY ONLY Pair of 1930s GEC interphones used in Wembley Stadium London in the 1930s

Image 1930s GEC interphone
History of wooden telephones in NZ:
The history of wooden telephones in New Zealand can be traced back to the late 19th century when telephone communication was first introduced in the country. During this period, telephone technology was rapidly evolving, and wooden telephones were among the earliest models to be used.
In the 1870s, Alexander Graham Bell's invention of the telephone began to gain attention worldwide. The technology soon reached New Zealand, and the first telephone exchange in the country was established in Wellington in 1878. Initially, these early telephones were mostly wall-mounted units made of wood. They featured a hand-cranked magneto generator for powering the call and a wooden box for the receiver and transmitter components.
As the telephone network expanded across New Zealand, more sophisticated wooden telephone models were introduced. These telephones were typically constructed with wooden cabinets or cases and had a rotary dial for number selection or a hook switch for connecting calls. The wooden enclosures were often made of polished or varnished wood, giving them an elegant appearance.
Wooden telephones were commonly used in New Zealand until the mid-20th century when newer materials like Bakelite and plastic became prevalent. These materials offered advantages such as lower cost, better durability, and increased design flexibility. As a result, telephone manufacturers started transitioning from wooden models to more modern materials.
Today, wooden telephones from the early days of telecommunications in New Zealand are considered collectors' items and can be found in museums or private collections. They serve as a reminder of the country's telecommunication history and the advancements made in technology over the years.
It's important to note that while I strive to provide accurate information, the specific details and models of wooden telephones used in New Zealand may vary. Further research or consulting historical archives and collections focused on New Zealand's telecommunications history would provide more precise and in-depth information
Restoring a wooden telephone:
Restoring a wooden telephone can be a rewarding project that allows you to bring a piece of history back to life. Here are some general steps you can follow to restore a wooden telephone:
Assess the condition: Examine the telephone carefully to identify any damage, such as cracks, scratches, or missing parts. Take note of the extent of the restoration work required.
Clean the telephone: Use a soft, damp cloth to clean the surface of the wooden telephone. Be gentle to avoid causing any further damage. If the telephone has accumulated dirt or grime over the years, you can use a mild soap solution to clean it. Ensure that the telephone is completely dry before proceeding to the next step.
Repair any damage: If there are cracks or splits in the wood, you can use wood glue to rejoin the pieces. Apply a small amount of glue to the damaged area and carefully press the pieces together. Wipe off any excess glue and use clamps or tape to hold the pieces in place until the glue dries. If any parts are missing, you may need to source replacements or consider fabrication if necessary.
Sand the wood: Use fine-grit sandpaper to sand the entire wooden surface of the telephone gently. Sanding helps to remove any imperfections, smooth out the wood, and prepare it for refinishing. Take care not to remove any original markings or engravings during this process.
Apply a finish: Select an appropriate finish for the wood, such as varnish or lacquer. Apply the finish following the manufacturer's instructions, and ensure you work in a well-ventilated area. Apply thin, even coats, allowing each coat to dry before applying the next. This process helps to protect the wood and enhance its appearance. If desired, you can also stain the wood before applying the finish to achieve a particular color or tone.
Clean and polish metal parts: If the telephone has metal components, such as the dial or other hardware, clean them with a gentle metal cleaner or a mixture of vinegar and water. Polish the metal parts to restore their shine and remove any tarnish or corrosion.
Reassemble the telephone: Once the finish has fully dried, reassemble the telephone, ensuring that all the parts fit properly. Take care not to force any components, as this could cause damage.
Test the functionality: If you intend to use the telephone, check that it is in working order. Ensure that the wiring and electrical components are intact and functional. If there are any issues, you may need to seek professional help from a technician with expertise in vintage telephones.
Remember, the specific steps and techniques may vary depending on the make and model of the wooden telephone you are restoring. It's important to research and consult additional resources, such as restoration guides or experts, to ensure you are following the appropriate procedures for your specific telephone model.

